Crusty Rustic Bread - Dutch Oven Boule
- Nov 10, 2025
- 5 min read

*We may earn a small commission when you purchase products through our links. Our disclosure policy.
There was a time when I was very intimidated by yeast breads. I started with my Honey Oatmeal Bread, and then wanted to perfect a crusty loaf. I ordered Bonnie O'Hara's Bread Baking for Beginners, and quickly realized I needed a Dutch oven for this simple bread. After following her recipes to a T, I gained confidence and started to adapt them to my taste, and with ingredients that I was already using in my honey oatmeal loaf. I also discovered I enjoyed working with a higher hydration dough and simplifying the steps. It's perfect every time, and one I often gift with my homemade raspberry jam and a dozen of our farm-fresh eggs!
This recipe makes 1 loaf.
Helpful photos are below the recipe.
Tools You'll Need
Dough Whisk, I prefer this tool, but you can use your hands.
Thermometer, I realized quickly that I did not need this tool each time. Our water falls in the range of 100-110℉ to activate the yeast. I still use it for cooking proteins, so it was worth the purchase!
Clean Dish Towel
Ingredients
10 grams instant yeast
395 grams warm water (100-110℉)
500 grams bread flour, plus more for dusting our workspace.
10 grams French grey salt
Extra Virgin Olive Oil
Prep & Inactive Time: 3 hours
Bake Time: 33 to 35 minutes
Recipe
Weigh all of your ingredients separately before beginning. To get an accurate reading, use smaller bowls and dishes. I am usually multitasking, so I always use my phone calculator to make sure I'm accurate!
Add the warm water to the large mixing bowl. Sprinkle the yeast on top. Mix with your dough whisk, or fingers. Allow to sit for 3-5 minutes, or until it begins to foam.
Next, sprinkle the bread flour on top. Finally, sprinkle the French grey salt on top. This ensures the salt does not stop your yeast from rising.
Use your dough whisk or hands, and mix the ingredients. I like to fold over the ingredients as I combine them to make sure they are distributed properly. The dough will be wet. Cover the bowl with a clean dish towel, and wait for 20 minutes.

Ingredients for Crusty Boule 
Mixing Dough 
Mixed Bread Dough 
Covering Dough For 20 Min Rest 
Rested Dough Now we will develop the gluten! Uncover your bowl. Over the bowl, add a bit of Extra Virgin Olive Oil to your dominant hand. Tuck your hand under one side of the dough. Pull up, and stretch it over itself. Turn the bowl, and grab another corner of the dough, pull up, and stretch it over itself. Continue to do this as you work your way around the dough. I typically do this 4 times. Bonnie describes this in her book as visualizing a clock. Start at 12 o'clock, pull down to 6. It's a helpful tip! You will have a tightly formed ball.

Folding Boule Dough 
Folding & Stretching Dough 
Formed Dough Ball Add a bit of flour to one side of your clean dish towel. Drape it back over your bowl with the flour side down. Set a timer for 1 hour and 30 minutes. Keep the bowl in a warm area, away from any drafts.
After 1 hour and 30 minutes, uncover your bowl. Your dough should have risen, and look lighter with noticeable air bubbles. If your dough does not look like the photos I've included below, allow it to rise another 20-30 minutes.

Risen Boule Dough Next, we will shape the dough for proofing - the final rise. Please use the photos below for reference. Sprinkle your clean work surface with a bit of flour. Gently turn the dough out onto the floured area. Pour about 1 tablespoon of the olive oil into the bowl. Use your fingers to coat the bowl. Gently stretch your dough into a rectangular shape. I prefer to have the shorter end at the top, and slowly shake the dough down towards me into the rectangular shape. Now, we will do a letter fold. Fold the side farthest away from you to the center of the dough. Fold the bottom side up to meet the top outer edge. Next, fold the right edge into the center. Finally, fold the left side over to the right to the outer edge. You will have a rounded square shape. Place your dough seam-side down in the mixing bowl. Cover the bowl with a kitchen towel, and set a timer for 1 hour. Place your empty Dutch oven, with the lid on, into your oven. Preheat the oven to 475℉. It is important to allow the Dutch oven to preheat while the dough is on its final rise.
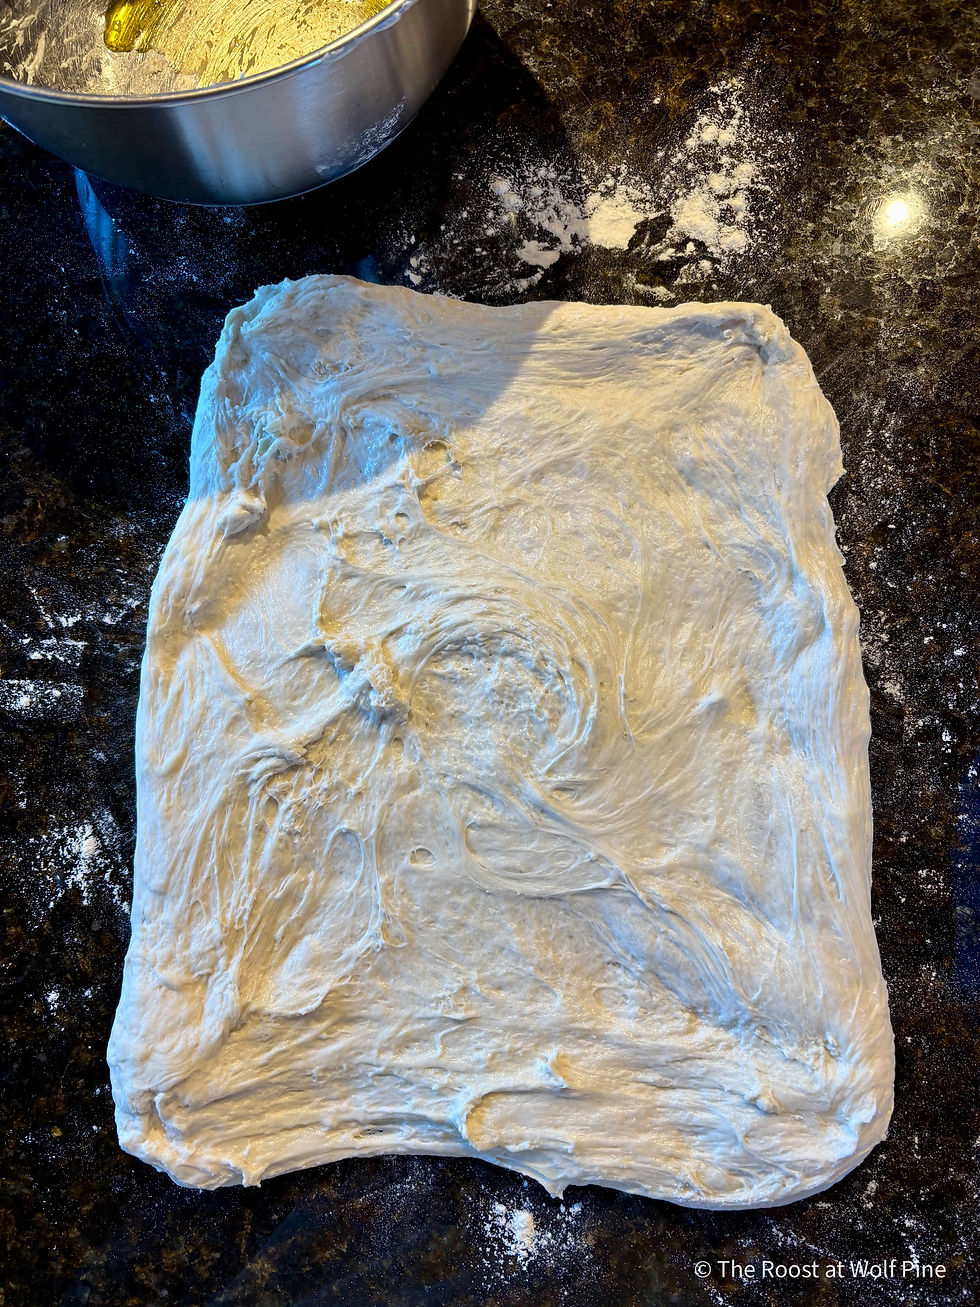
Stretched Dough 
Letter Folding of Dough 
Letter Folding Dough 
Letter Folding Dough 
Final Letter Fold - Seam is on top near the right. 
Boule Dough Ready for Final Rise - Seam Down. Check to make sure your dough looks light, airy, and puffed up. If your bread does not look similar to the photo below, allow the dough to rise an extra 30 minutes.

Dough after proofing for 1 hour. Sprinkle a bit of flour onto your work surface, and turn your dough out so the seam side is now facing up. Now we will do the trickiest part of the recipe, getting the dough into the Dutch oven. Use oven mitts to remove your VERY hot Dutch oven from the oven, and place it on the stove top. Remove the lid and set it to the side. Next, remove your oven mitts, and gently scoop up your dough with your hands. Don't worry when the shape changes a bit! Carefully place the boule into the Dutch oven. Put on your oven mitts to place the lid back on. Place the Dutch oven into the oven, and set the timer for 25 minutes.

Dough turned out on the counter, ready to bake. After 25 minutes, use your oven mitt to remove the lid. Your loaf should be risen and slightly golden. Continue to cook for 8-10 minutes uncovered. If you prefer a darker loaf, cook for a few more minutes, but watch it closely! Tap the top of your loaf and listen for a hollow sound. Your loaf is ready to cool! Turn it out onto a cooling rack, and allow to cool for at least 30 minutes so the crumb may set. Our kids love to listen to the crackling as the bread cools! Your Caraway Dutch Oven will be easy to clean once it cools!
Finished Loaf


